How to Utilize Sprint for Aggressive Engage Plays on Tanks
How to Utilize Sprint for Aggressive Engage Plays on Tanks
Artikel Terbaru

Elden Ring Shard Of Alexander Location And How To Obtain It
Elden Ring Shard Of Alexander Location And How To Obtain It
The Shard of Alexander is widely regarded as one of the most powerful talismans in Elden Ring due to its massive boost to weapon skill attack power. Obtaining this coveted item requires following the lengthy questline of Iron Fist Alexander, the beloved living jar warrior. Traversing the Lands Between to secure this item will dramatically enhance any build focused on weapon abilities.
Starting the Journey with Iron Fist Alexander
Your search for the talisman begins early in Northern Stormhill, where Alexander is first found lodged firmly in the ground. Knocking him free using a heavy attack earns his initial gratitude and sets his journey in motion across the realm. You will encounter him again in Gael Tunnel on the border of Caelid before meeting him at Redmane Castle.
Participating in the Radahn Festival is a major milestone for continuing his narrative arc. After assisting in defeating Starscourge Radahn, exhaust his dialogue on the battlefield as he gathers remnants to grow stronger. This step ensures he advances to his subsequent quest locations without stalling.
Advancing Through Liurnia and Mt. Gelmir
Next, seek out Alexander near the Carian Study Hall in Liurnia of the Lakes, where he becomes stuck in a hole once again. Throwing an Oil Pot at him before hitting him will free him safely without causing harm. You can also encounter him taking a bath in a lava pool near Fort Laiedd in Mt. Gelmir.
Speaking to him while standing safely on the rocks near the lava lake triggers vital story dialogue. He will gift you a piece of armor and declare his intention to head toward the Forge of the Giants. You can optionally summon him to assist in the fight against the Fire Giant shortly after.
Finding the Shard of Alexander Location
The final destination for Iron Fist Alexander is located high within the airborne ruins of Crumbling Farum Azula. To reach his location, navigate through the region until you unlock access to the Dragon Temple Lift Site of Grace. Head through the plaza past the undead enemies and climb the stairs toward the exposed ruined rooftops.
Standing atop a large stone structure, Alexander waits for one final honorable duel against the Tarnished. He reflects on his journey and challenges you to test his strength in battle. Defeating him here is necessary to obtain the powerful item.
Rewards for Defeating the Jar Warrior
Upon defeating Alexander in Crumbling Farum Azula, he yields the Shard of Alexander alongside Alexander's Innards. This talisman boosts the attack power of skills by fifteen percent, providing a huge benefit for melee and magic builds alike. Ensure you complete his full questline rather than killing him early, as premature defeat yields only the vastly inferior Warrior Jar Shard.
1 bulan yang lalu

Mortal Kombat Vs Street Fighter History Characters And Fighting Game Differences
Mortal Kombat Vs Street Fighter History Characters And Fighting Game Differences
The legendary rivalry between Mortal Kombat and Street Fighter has shaped the fighting game genre for over three decades. While both franchises emerged as arcade giants in the early 1990s, they captured audiences through vastly different visual styles, control schemes, and mechanical philosophies. Understanding their unique histories and core gameplay mechanics highlights why both series continue to thrive alongside each other today.
The Historical Arcade Rivalry
Capcom revolutionized competitive arcade gaming in 1991 with the release of Street Fighter II, setting the baseline for special move inputs and precise spacing. Midway responded in 1992 by releasing Mortal Kombat, which instantly gained attention for its digitized graphics and explicit finishing moves known as Fatalities. This clash created a historic arcade rivalry where players aligned themselves with either Capcom's martial arts discipline or Midway's dark fantasy violence.
Throughout the 1990s and 2000s, both franchises evolved along distinct paths to keep their fanbases engaged across home consoles. Street Fighter focused heavily on refining frame data, balance, and competitive tournament structures. Meanwhile, Mortal Kombat expanded its cinematic storytelling, lore, and rich single-player content to appeal to casual and hardcore audiences alike.
Iconic Character Roster and Design Approaches
The character rosters in both series reflect their overarching design philosophies and thematic tones. Street Fighter features worldwide martial artists like Ryu, Ken, and Chun-Li, whose designs emphasize clean silhouettes and traditional combat disciplines. These characters serve as foundational templates for fundamental fighting game concepts like zoning and rushdown tactics.
Conversely, Mortal Kombat presents an expansive multiverse filled with ninja clans, otherworldly monsters, and deities such as Scorpion, Sub-Zero, and Raiden. The roster places a heavier emphasis on dark lore, weapons, and lethal special abilities. Additionally, Mortal Kombat frequently integrates pop-culture guest characters from movie franchises, whereas Street Fighter mostly crosses over with other Capcom intellectual properties.
Core Gameplay and Control Differences
From a mechanical perspective, the two franchises handle defensive options and move inputs in fundamentally different ways. Street Fighter relies on a six-button layout with directional blocking, meaning players hold back to guard against incoming strikes. Mortal Kombat utilizes a dedicated block button and four main attack buttons, altering how cross-ups and defensive positioning work in live matches.
Combination mechanics also vary significantly between both fighting game titles. Street Fighter uses precise links and cancels that require exact frame timing to connect attacks into long strings. Mortal Kombat relies on a target dial-a-combo system alongside juggle mechanics, allowing players to extend aerial combos as opponents bounce through the air.
Legacy and Modern Fighting Game Impact
Today, both franchises represent the pinnacle of 2D fighting game design while catering to different playstyles. Street Fighter 6 continues to set industry standards for competitive netcode, footsies, and esports balance. Meanwhile, Mortal Kombat 1 delivers cinematic story modes and deep customization options that keep casual players deeply invested.
Ultimately, the coexistence of both series has enriched the entire gaming industry for decades. Players looking for strict martial arts fundamentals often gravitate toward Capcom's flagship title, while those seeking theatrical violence and combo juggling prefer NetherRealm's universe. You can explore more gaming insights on our main hub for continuous updates on competitive titles.
1 bulan yang lalu

Best Things To Sell In Stardew Valley For Easy Profit
Best Things To Sell In Stardew Valley For Easy Profit
Building a successful farm in Stardew Valley requires balancing early survival with long-term financial growth. While new players often rely on simple daily tasks, understanding which items offer the highest return on investment makes expanding your farm much faster. Focus on key items across every season to maximize earnings with minimal effort.
Early Game Income Strategies
In your first year, gathering quick cash is essential for purchasing seeds and upgrading tools. Fishing at the Mountain Lake or river during rainy days yields high-value fish that boost your daily funds rapidly. Additionally, harvesting crops like potatoes in Spring and blueberries in Summer ensures a steady income loop.
Foraging for wild plants and tapping trees on your property also creates steady secondary revenue. Selling extra gemstones and minerals found in the early levels of the mines can help cover immediate expenses. Combining these routine activities helps build the financial base required for advanced farm setups.
High-Value Artisan Goods
Processing raw harvests into artisan goods is the most lucrative strategy in the entire game. Turning high-value fruits like Starfruit or Ancient Fruit into wine using kegs multiplies their selling price significantly. Aging this wine inside casks yields iridium-quality bottles that fetch massive profits on the market.
Animal products transformed into processed items also deliver reliable daily profits. Barn pigs generate truffles, which can be processed into expensive Truffle Oil with an Oil Maker. Turning milk into cheese or eggs into mayonnaise guarantees that daily livestock care pays off consistently.
Passive Profits with Crops and Forage
Choosing crops that continue producing after a single planting saves significant time and seed costs. Crops like blueberries, cranberries, and greenhouse-grown Ancient Fruit yield multiple harvests across their active growing periods. This allows farmers to focus on processing goods rather than constantly replanting fields.
Placing Bee Houses near vibrant flowers like Fairy Roses allows you to collect high-grade honey passively. Selecting specific professions, such as Botanist, guarantees that all gathered forage reaches iridium quality automatically. These low-effort systems generate substantial gold while freeing up time for mining or exploration.
Maximizing Profits in Late Game
Transitioning to late-game play requires optimizing every square foot of your farm and greenhouse. Filling sheds with kegs, preserve jars, and crystalariums producing diamonds guarantees massive ongoing returns. Diversifying your production ensures a continuous flow of gold regardless of the current season.
1 bulan yang lalu

Pokemon Scarlet Art Final Answers And How To Solve The Questions
Pokemon Scarlet Art Final Answers And How To Solve The Questions
Attending classes at the Naranja or Uva Academy in Pokémon Scarlet and Violet provides players with a fun break from battling and exploring the Paldea region. Among the various subjects taught by academy faculty, Mr. Hassel's Art class focuses on aesthetics, regional landmarks, and the visual details of Pokémon. Passing the Art Final exam requires answering at least four out of five questions correctly to earn valuable EXP Candies.
Art Final Exam Questions and Correct Answers
The first question asks for the name of the restaurant where trainers can change a Pokémon's Tera Type, which is The Treasure Eatery. The second question tests your memory of Brassius's signature art installation, correct answer being Surrendering Sunflora. For the third question about the Ten Sights of Paldea, the correct response is Two waterfalls.
Solutions for the Remaining Art Final Questions
The fourth question asks where you can find the Million Volt Skyline, which is located in Levincia. The final question presents a statement claiming that a Pokémon's marks are present when first met and none can be added later, which is False. Selecting these precise answers guarantees a passing grade on Mr. Hassel's final exam.
How to Unlock and Prepare for Academy Exams
Unlocking the Art Final requires players to complete all six Art classes and pass the midterm exam earlier in the story. Attending classes regularly reveals lore about the Paldea region and deepens your bond with the teaching staff. Reviewing class dialogues before taking the exam helps refresh your memory on key details covered during lectures.
Rewards for Passing the Art Final in Paldea
After submitting your answers at the front desk, passing the Art Final rewards you with five Medium EXP Candies. Continuing to speak with Mr. Hassel after completing his curriculum builds trust and leads to additional story rewards. Completing academy courses is an effective way to level up your team while discovering hidden details about the game world.
1 bulan yang lalu

Pokemon Scarlet Art Final Answers And How To Solve The Questions
Pokemon Scarlet Art Final Answers And How To Solve The Questions
Attending classes at the Naranja or Uva Academy in Pokémon Scarlet and Violet provides players with a fun break from battling and exploring the Paldea region. Among the various subjects taught by academy faculty, Mr. Hassel's Art class focuses on aesthetics, regional landmarks, and the visual details of Pokémon. Passing the Art Final exam requires answering at least four out of five questions correctly to earn valuable EXP Candies.
Art Final Exam Questions and Correct Answers
The first question asks for the name of the restaurant where trainers can change a Pokémon's Tera Type, which is The Treasure Eatery. The second question tests your memory of Brassius's signature art installation, correct answer being Surrendering Sunflora. For the third question about the Ten Sights of Paldea, the correct response is Two waterfalls.
Solutions for the Remaining Art Final Questions
The fourth question asks where you can find the Million Volt Skyline, which is located in Levincia. The final question presents a statement claiming that a Pokémon's marks are present when first met and none can be added later, which is False. Selecting these precise answers guarantees a passing grade on Mr. Hassel's final exam.
How to Unlock and Prepare for Academy Exams
Unlocking the Art Final requires players to complete all six Art classes and pass the midterm exam earlier in the story. Attending classes regularly reveals lore about the Paldea region and deepens your bond with the teaching staff. Reviewing class dialogues before taking the exam helps refresh your memory on key details covered during lectures.
Rewards for Passing the Art Final in Paldea
After submitting your answers at the front desk, passing the Art Final rewards you with five Medium EXP Candies. Continuing to speak with Mr. Hassel after completing his curriculum builds trust and leads to additional story rewards. Completing academy courses is an effective way to level up your team while discovering hidden details about the game world.
1 bulan yang lalu
Breath Of The Wild Moblin Locations And Combat Tips
Breath Of The Wild Moblin Locations And Combat Tips
Moblins are among the most imposing tall creatures that travelers encounter throughout the kingdom of Hyrule in The Legend of Zelda: Breath of the Wild. Their immense reach and high physical strength can easily overpower underprepared players during early and mid-game exploration. Understanding where these towering foes gather and how to counter their heavy attacks is essential for surviving wild encounters.
Primary Moblin Farming and Encounter Locations
Players searching for Moblins will find them patrolling monster outposts across almost every major region in Hyrule. High-density areas include the fields surrounding Hyrule Castle, the Akkala Highlands, and wooded areas near the Great Plateau like the Forest of Time. Standard red Moblins appear early in lower-level zones, while stronger blue, black, and silver variants spawn in late-game regions as your overall progression increases.
At night, players can also encounter skeletal Stalmoblins emerging from the ground across open plains and valleys. Clearing out these nocturnal variants grants valuable monster parts such as Moblin Horns, Fangs, and Guts necessary for armor upgrades. Tracking these spawn points ensures you always have access to essential crafting components and unique weapon drops.
Key Combat Weaknesses and Tactical Exploits
Despite their massive size and heavy weaponry, Moblins possess several distinct vulnerabilities that clever adventurers can exploit. Shooting a Moblin directly in the eye with an arrow causes an immediate stun, giving you a safe window to close the distance and unleash melee combos. Additionally, because Moblins cannot swim, using Korok Leaves or Remote Bombs to knock them into deep water results in an instant defeat.
Elemental weapons provide another reliable method for managing these imposing targets during chaotic skirmishes. Striking a Moblin with ice attacks freezes them completely, allowing your next physical blow to deal triple damage. Lightning attacks disarm them instantly, forcing them to fight unarmed or search for nearby objects.
Navigating Moblin Attacks and Behaviors
Moblins feature long-range melee swings with spears, clubs, and heavy two-handed weapons that can break through standard shield blocks. Staying mobile and mastering the Flurry Rush mechanic allows you to dodge their slow wind-up animations and retaliate with rapid strikes. Oddly enough, staying extremely close while crouching can sometimes make their horizontal weapon swings miss over Link's head.
In group battles, Moblins display unpredictable behaviors such as grabbing smaller Bokoblins and throwing them directly at you. Prioritizing the Moblin with stun attacks prevents them from disrupting your positioning or hurling allies into your path. Maintaining situational awareness makes even multi-enemy encounters significantly easier to control.
Best Gear and Weapon Strategies Against Moblins
Using fast one-handed swords or bows allows you to deal consistent damage while keeping enough mobility to avoid heavy counterattacks. Sneakstrikes executed with stealth armor yield massive damage multipliers that can eliminate unaware Moblins before combat even starts. Preparing strength-boosting meals or defense-enhancing elixirs further minimizes risk during tough encounters.
When defeated, Moblins frequently drop heavy weapons like Moblin Clubs and Dragonbone Spears that deal significant damage. Collecting these drops builds up a reliable arsenal for tackling even tougher threats across Hyrule. Combining proper gear preparation with smart tactical movement guarantees consistent victory against these iconic monsters.
1 bulan yang lalu

What Happens If I Free Orpheus BG3 Story Consequences And Major Outcomes
What Happens If I Free Orpheus BG3 Story Consequences And Major Outcomes
Deciding the fate of Prince Orpheus in Baldur's Gate 3 represents one of the most pivotal narrative climaxes in Act 3. Players who obtain the Orphic Hammer face a critical choice that fundamentally reshapes the final showdown against the Netherbrain. Understanding the immediate consequences and long-term outcomes helps adventurers navigate this dramatic turning point.
The Emperor Abandons Your Party
When you use the Orphic Hammer to shatter the bound crystals, the Emperor immediately considers your action an unforgivable betrayal. Feeling vulnerable without Orpheus's suppressed power to shield him, he flees the Astral Plane and sides with the Netherbrain. Consequently, you will be forced to confront your former guardian as an enemy in the final battle.
This shift removes a key ally from your immediate group during the final sequence. However, freeing the prince provides a powerful alternative companion for the fights ahead. Orpheus bestows his protection directly upon your party to prevent transformation.
Someone Must Become a Mind Flayer
Despite releasing the Githyanki prince, the absolute necessity of an Illithid wielding the Netherstones remains unchanged. Orpheus explains that beating the Netherbrain requires the raw mental output of a Mind Flayer. You must decide whether your main character, Karlach, or Orpheus himself undergoes ceremorphosis.
If Karlach is in your party, she may volunteer to transform to save her own life from her failing infernal engine. Alternatively, Orpheus can selflessly make the sacrifice to save Faerûn. Should Orpheus transform, he asks to be honorably slain once the brain is destroyed.
Shaping the Future of the Githyanki
Releasing Orpheus permanently alters the political hierarchy of the Githyanki empire. Whether he survives as a Githyanki or becomes an Illithid martyr, his freedom sparks a massive rebellion against the tyrant Vlaakith. This event inspires Lae'zel to embrace her true destiny as a leader of her people.
If Orpheus lives in his original form, he rides off on dragons alongside Lae'zel to wage war in the Astral Plane. If he transforms, he entrusts his legacy directly to Lae'zel before his death. In both scenarios, the Githyanki break free from centuries of false indoctrination.
1 bulan yang lalu

Casino Party Rentals Near Me and How to Plan a Casino Themed Event
Casino Party Rentals Near Me and How to Plan a Casino Themed Event
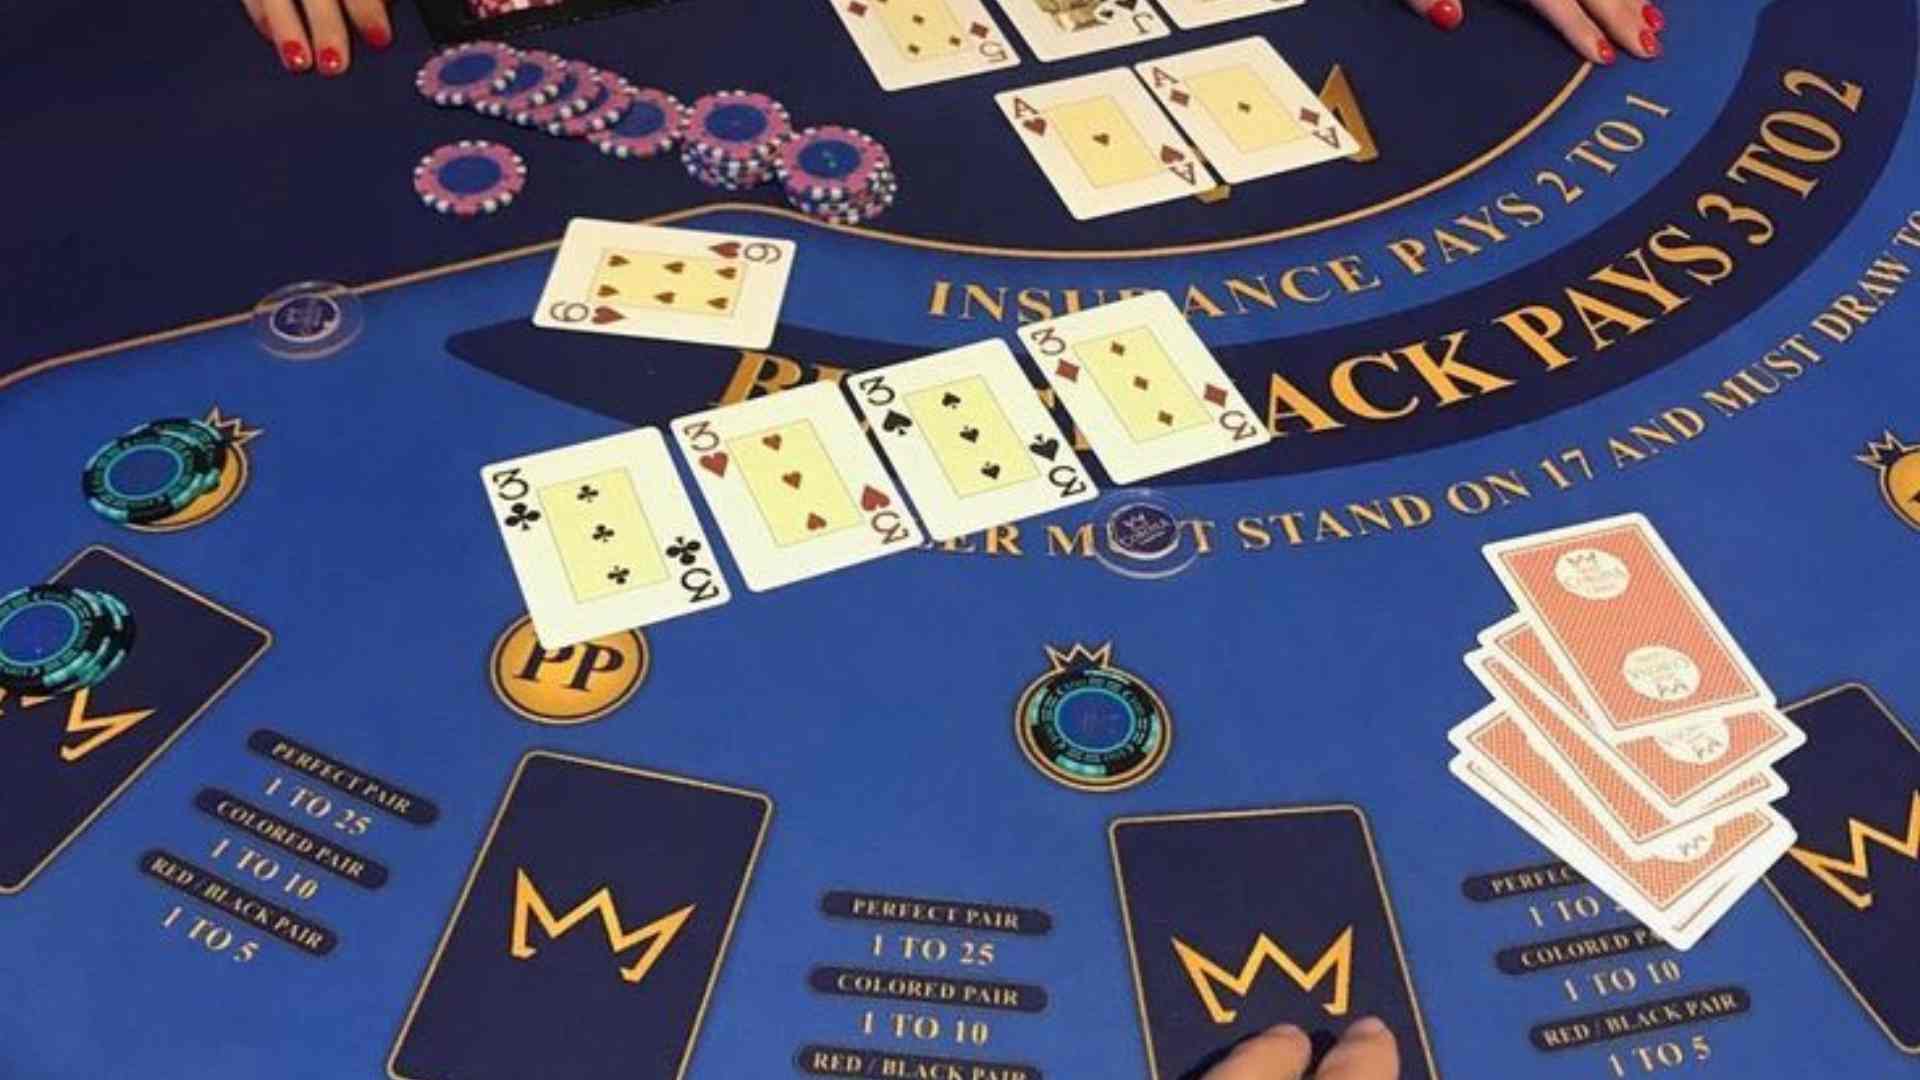
Hosting a casino-themed party brings the thrill and sophistication of a real gaming floor directly to your chosen venue. Whether you are organizing a corporate gala, a milestone birthday, or a charity fundraiser, sourcing local rental services is the most effective way to secure authentic equipment. Understanding how to coordinate equipment, staffing, and atmosphere ensures your guests enjoy an unforgettable evening of entertainment.
Finding the Best Local Casino Party Rental Providers
Searching for nearby rental vendors requires looking beyond basic price comparisons to evaluate overall service quality. Premier rental companies supply commercial-grade poker tables, roulette wheels, and blackjack setups that replicate genuine casino standards. Checking local customer reviews and verifying vendor insurance helps guarantee a seamless installation on the day of your event.
It is equally important to discuss delivery logistics and venue access with prospective equipment suppliers early in the planning process. Professional rental services handle full setup, teardown, and leveling of heavy gaming tables to safeguard your venue floors. Establishing clear timelines with your vendor prevents unexpected delays during event preparation.
Selecting the Right Games for Your Guest List
Curating a balanced selection of table games keeps guests engaged regardless of their experience level. Blackjack and roulette remain the most popular choices because their rules are simple for beginners to grasp quickly. Including Texas Hold'em or craps tables adds variety and caters to attendees seeking higher strategy and active participation.
Entertainment value increases when guests feel comfortable exploring different gaming stations throughout the night. Many organizers incorporate digital resources or online guides like m88 to familiarize themselves with popular gaming layouts before hosting. Providing beginner-friendly tables ensures everyone can participate without feeling intimidated by complex rules.
Hiring Professional Dealers and Managing Event Flow
Experienced dealers do far more than manage cards and chips; they act as primary entertainers who guide the flow of your event. Professional dealers explain rules patiently to novices while maintaining an energetic and welcoming atmosphere at every table. Sourcing trained personnel through your rental vendor guarantees staff members adhere to proper gaming etiquette.
Managing the flow of play requires establishing a clear play-money system before gaming opens. Distributing custom vouchers or play bills at check-in allows guests to exchange them for gaming chips seamlessly. At the conclusion of the evening, accumulated chips can be converted into raffle tickets for prizes, keeping competition fun and legal.
Enhancing the Venue Atmosphere and Theme Details
Transforming a standard hall into an elegant casino environment relies heavily on lighting, decor, and thematic music. Incorporating mood lighting, red carpet entrances, and sleek backdrop displays elevates the visual impact of your rental equipment. Upbeat lounge music or classic jazz playlists complete the immersive atmosphere without overwhelming table conversations.
Coordinating food and beverage service around table gameplay keeps energy levels high throughout the night. Finger foods and passed appetizers work best because they allow guests to snack comfortably between gaming rounds. Offering signature themed cocktails adds a memorable, customized touch that complements your event setup.
1 bulan yang lalu

What does push mean in sports betting Understanding Push Results and Wagers
What does push mean in sports betting Understanding Push Results and Wagers
In sports betting, encountering a push is a common scenario that can surprise both beginner and experienced bettors. A push occurs when a wager ends in an exact tie between the bettor and the sportsbook based on the established line. When this happens, no money is won or lost, and the original stake is fully refunded to the player's account.
How a Push Occurs in Different Betting Markets
A push typically happens when betting on whole-number point spreads or point totals. For instance, if a team is favored by three points and wins by exactly three, the result hits the exact spread line. Similarly, if an over/under total is set at 45 points and the combined final score equals 45, the wager pushes.
Sportsbooks frequently use half-point increments, known as hooks, to prevent a push from happening. Lines set at 3.5 points or 45.5 totals ensure that every outcome results in a clear win or loss. Understanding how bookmakers structure these lines helps bettors anticipate potential ties before placing their stakes.
Impact of a Push on Parlays and Multiple Wagers
When a push happens within a multi-leg parlay, the affected leg is simply removed from the overall wager. Instead of causing the entire parlay ticket to fail, the bet recalculates using the remaining selections. For example, a four-leg parlay with one push automatically converts into a standard three-leg parlay.
This rule protects the bettor from losing an entire combination ticket due to a neutral outcome. However, it also lowers the overall potential payout because the odds adjust to reflect fewer legs. Analyzing how major sportsbooks handle parlay adjustments ensures players know what payout to expect after a tie.
Strategies to Manage and Avoid Push Outcomes
Bettors looking to avoid push scenarios altogether can choose lines that feature half-points. Many modern gaming platforms, such as link m88, offer customizable alternative lines that allow users to buy or sell points. Adjusting a spread from three to two and a half eliminates the tie possibility completely.
Another approach is evaluating whether taking a whole-number line offers better risk management. Accepting a push can serve as a safety net that protects your bankroll against an unfavorable final play. Weighing the balance between potential refunds and guaranteed decision lines remains an essential part of long-term betting strategy.
The Key Takeaway for Sports Bettors
Ultimately, a push represents a neutral outcome that neutralizes financial risk for a specific event. While it does not deliver a profit, receiving a complete refund allows bettors to preserve their bankroll for future opportunities. Recognizing how push rules work across different markets ensures a smoother, more confident sports wagering experience.
1 bulan yang lalu

Online Casino Real Money Arkansas Understanding Real Money Gaming Options
Online Casino Real Money Arkansas Understanding Real Money Gaming Options
Navigating the evolving digital gaming environment in Arkansas requires a clear understanding of current state laws and available entertainment formats. While traditional commercial casinos operate physical locations within the state, digital real money gaming remains subject to specific statutory limits. Residents and visitors seeking interactive wagering options must carefully distinguish between authorized platforms and alternative models.
Current Legal Status of Digital Gaming in Arkansas
Arkansas state law currently permits regulated retail casinos and mobile sports betting, but traditional online slots and table games are not explicitly licensed. Local regulators focus primarily on physical racing resorts and sportsbooks to generate state revenue. As a result, commercial online real money casinos have not received full regulatory approval across the state.
Understanding these legislative parameters helps consumers avoid unlicensed operators that function outside legal frameworks. Players exploring global digital platforms often review guides on link m88 to understand how legal frameworks differ internationally. Staying informed ensures a safer and more predictable online experience.
Social and Sweepstakes Casino Alternatives
Because traditional commercial online casinos are unavailable, social and sweepstakes platforms serve as the primary legal alternative for Arkansas residents. These platforms utilize virtual currencies, allowing participants to enjoy casino-style games without direct monetary wagering. Players can win promotional entries that are redeemable for actual cash prizes under legal sweepstakes rules.
These platforms operate legally across most US states by adhering to federal and local sweepstakes standards. They offer classic table games, digital slots, and live dealer options tailored for casual entertainment. This model provides an accessible way to experience digital gaming while remaining fully compliant with state regulations.
Safety and Consumer Protection Considerations
Prioritizing digital security is essential when evaluating any online entertainment platform. Licensed social casinos utilize encryption technology to safeguard user data and ensure fair game outcomes through certified random number generators. Verifying platform credentials before creating an account helps protect sensitive financial details.
Responsible gaming tools are also widely integrated into reputable interactive sites. Features such as self-exclusion options, purchase limits, and activity reminders support healthy gaming habits. Utilizing these controls helps users maintain full command over their digital entertainment expenditures.
Future Outlook for Arkansas iGaming Expansion
The success of regulated mobile sports betting in Arkansas has sparked ongoing discussions regarding the expansion of full iGaming services. State lawmakers periodically evaluate market trends, tax benefits, and consumer demand from neighboring jurisdictions. Future legislative sessions may consider bills designed to establish a fully licensed commercial online casino framework.
Until explicit legislation is enacted, residents should remain reliant on legally compliant sweepstakes options and licensed venue sportsbooks. Following official updates from state gaming authorities ensures timely awareness of any policy shifts. Monitoring regulatory changes remains the best approach for tracking real money gaming expansion in Arkansas.
1 bulan yang lalu
Semua artikel sudah ditampilkan.